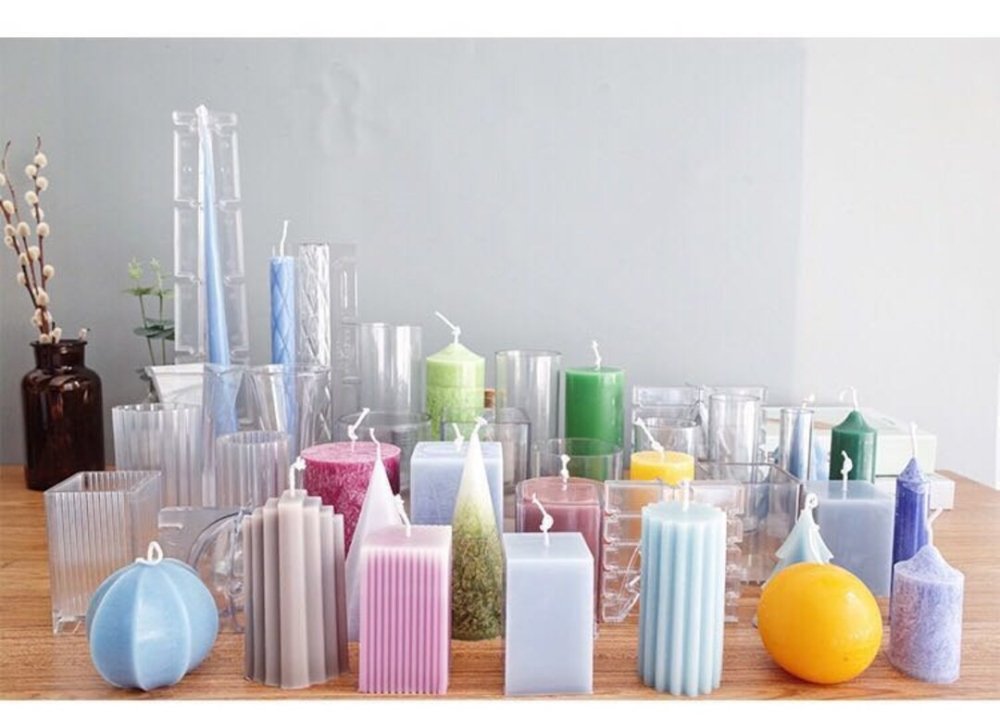
Using polycarbonate candle molds for making candles is a straightforward process that involves a few key steps. Polycarbonate molds are popular due to their durability and ease of use. Here's a step-by-step guide to help you get started:
**Materials You'll Need:**
1. Polycarbonate candle mold
2. Candle wax (paraffin, soy, beeswax, etc.)
3. Wick(s) appropriate for the size of your mold
4. Wick holder or adhesive (optional)
5. Fragrance oil or essential oil (optional)
6. Dye or colorant (optional)
7. Double boiler or microwave-safe container
8. Thermometer
9. Stirring utensil (non-metallic)
10. Release spray or oil
**Step-by-Step Guide:**
1. **Prepare Your Workspace:**
Set up a clean and organized workspace. Make sure you have all your materials ready before you start.
2. **Prepare the Mold:**
Clean and dry the polycarbonate mold to ensure that no residue or moisture is present. You may also apply a thin layer of release spray or oil to the mold's interior surface to aid in easy release of the finished candle.
3. **Wick Placement:**
Place the wick in the center of the mold. You can use a wick holder or a small amount of adhesive (like hot glue) to secure the wick at the mold's base. Make sure the wick is centered and straight.
4. **Melt the Wax:**
Melt the candle wax using a double boiler or a microwave-safe container. If using a microwave, heat the wax in short bursts and stir in between to avoid overheating. Use a thermometer to monitor the wax temperature. Different types of wax have different melting points, so follow the manufacturer's instructions for the specific wax you're using.
5. **Add Fragrance and Color (Optional):**
If desired, add fragrance oil or essential oil for scent and dye or colorant for color to the melted wax. Stir well to ensure even distribution.
6. **Pouring the Wax:**
Slowly pour the melted wax into the prepared polycarbonate mold. Fill the mold to the desired level, leaving some space at the top. Make sure the wick remains centered.
7. **Cooling and Setting:**
Allow the wax to cool and set. You can speed up the process by placing the mold in a cool, dry place or even in the refrigerator for a short time. Avoid moving or disturbing the mold while the wax is setting.
8. **Demolding:**
Once the wax is completely cooled and hardened, gently flex the sides of the polycarbonate mold to release the candle. The candle should easily pop out. If you encounter resistance, you can place the mold in the freezer for a brief period to help loosen the wax.
9. **Trim the Wick:**
Trim the wick to an appropriate length (usually around 1/4 to 1/2 inch) above the surface of the candle.
10. **Finishing Touches:**
Clean any excess wax from the mold using a soft cloth. You can also polish the candle's surface with a clean cloth to give it a nice shine.
11. **Safety Precautions:**
Always follow safety guidelines when working with hot wax and open flames. Work in a well-ventilated area, keep a fire extinguisher nearby, and never leave melting wax unattended.
Remember that practice makes perfect. You might not achieve perfect results on your first try, but with some experience, you'll become more skilled at using polycarbonate molds for candle making. Check out our amazing collection of moulds to start practicing! (Click here)